Share 4 pictures of your pelvis in yoga crescent pose. The three pictures are the moving pictures of adjusting the pelvic position and a correct and wrong comparison picture.4 yoga moving pictures teach you to adjust the pelvis and find the gluteal muscles
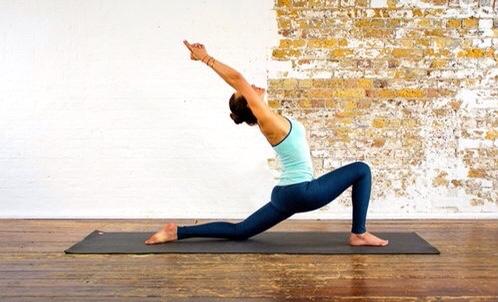
First, let’s get to know the yoga crescent pose, the picture below

It is often encountered during exercise sequences for hip opening and leg stretching. There are two requirements for the pelvis in this pose: straight and flat, neither one high, one low nor one forward and one backward; although it is a hip opener, the pelvis should still be retracted during the exercise, and the pelvis should not be allowed to fall. scattered.
Of course, in the riding style, these two requirements for the pelvis are also the two most common mistakes beginners make. These 4 pictures show these two points very clearly, and there are also adjustment actions. Let’s take a look together.
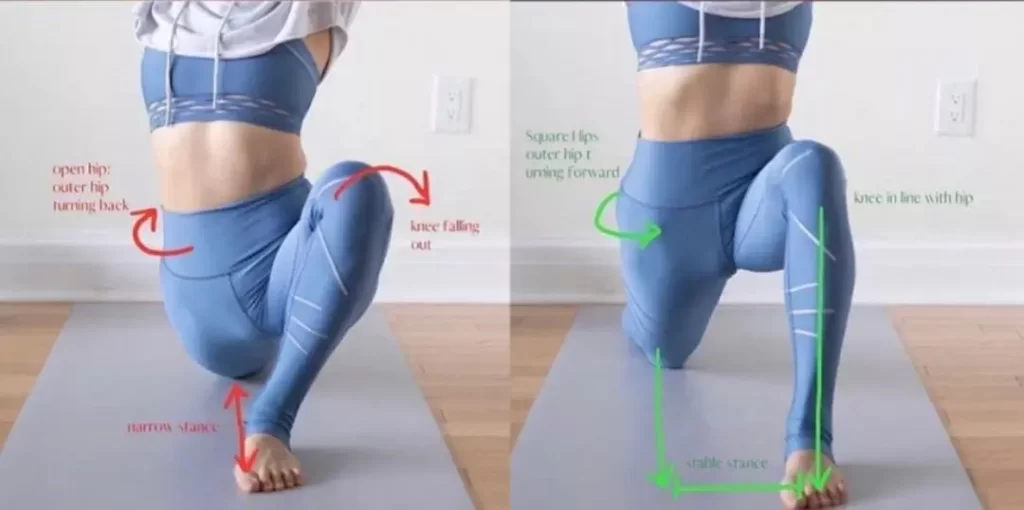
The first one: the correct and wrong comparison chart,
Incorrect demonstration: The entire pelvic region is fragmented and spread out. I still remember the analogy I gave you: the pelvis area is a square box. When you are doing the asana, you must also ensure that the box is squarely gathered in the middle, and don’t let any part of it run out. Especially when doing hip opener poses, pay special attention. You see the wrong example: the right hip is falling down and running backwards, while the left hip is running up and out. Hardly a single point converges in the middle.

In the wrong demonstration, the knees also run outward. In addition to the uneven force on the soles of the feet, it also has a great relationship with the left hip running outwards and upwards. After the hip is adjusted, the knees will come back a lot.
Look again at the correct demonstration that the pelvis is still a compact square box.
From the outside, it seems that the left side is going down more, and the groin area on the front side of the thigh is stretched more, but such exercises are too much compensation, which will only make the pelvis more and more scattered and destroy the stability of the joints.
The second picture: adjust the pelvic forward tilt,
Pay attention to observe the state of the pelvis before and after the adjustment of the model.
Before adjustment: the hips are slumped, the waist is too curved at the back, the lower abdomen on the front side protrudes forward and falls down, and the standard pelvis tilts forward.
Adjustment action: Raise the pubic bone, stand on the buttocks, push the middle of the buttocks forward, and cut the position of the buttocks eyebrows inward.
After adjustment: the ilium is upright, and the pelvis is straight. In addition to the pelvis being straight, you can take a closer look at the changes in the muscles of the left hip. Have you found that when the pelvis is straightened and the buttocks eyebrows are cut in, the buttocks muscles are obviously tightened. The line of the buttocks has been lifted, and the shape of the buttocks has become fuller.
The third picture: Adjust the pelvis one after the other.

Before adjustment: buckle the right knee inward, and run the right hip outward and upward; the left side is wide and everted; the left hip is behind and the right hip is in front.
Adjustment: Internally rotate the right hip so that the left groin faces the ground, and of course cut the left hip eyebrow; the left pelvis and left waist turn to the front; the right hip is pulled back, and the right hip sinks down.
After Adjustment: The pelvis is in a horizontal plane and the pressure on the posterior lumbar spine is released. Turning the left hip back will cause lateral compression of the lumbar spine.
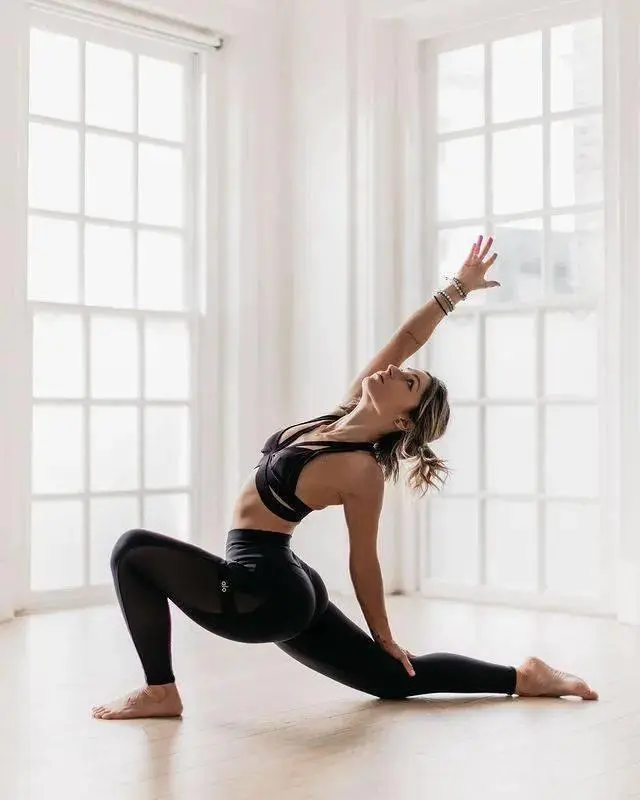
The fourth picture: Lift the ilium at the end of the pubic bone and stretch the front side of the body.
In fact, the action of this one and the action of the first one are the same effect. This one is for adjustment when preparing to enter, and this one is for adjustment after entering the pose. The purpose is to maintain the adjusted state of the first one and not let the pelvis fall forward. When the front side is twisted up, pay attention to the rear side of the buttocks and eyebrows should also be cut down, you will feel the burning of the buttocks muscles.

Although it is about the adjustment of the pelvis in the crescent moon pose, these pictures are also suitable for other poses with feet separated front and rear, such as warrior one, strengthening sideways, vertical fork horse, sleeping swan and so on.
After such adjustment, after this type of asana practice: the lumbar spine is relaxed and released, the hip muscles will be fully activated and activated, the front of the thigh and the iliopsoas will be fully stretched, the groin will be opened and stretched, and the flexibility of the hip joint will be increased. And the pelvis is firm and stable.
Correct practice can also be tiring, but the whole person is stretched, comfortable, relaxed and light.
Read more tips about health and fitness http://www.growmorehealth.com
