Today, I will talk with you about how to start backbend practice for yoga beginners who practice by themselves.How to start the first step in backbend practice
In “Introduction to Iyengar”, Upward Dog is the first real backbend we have encountered, so let’s take the upper dog as an example to talk about how to start the first step of backbend practice.
It has been emphasized many times before that backbend is a special type of posture that requires certain physical conditions and foundations to try to practice. Fortunately, a major feature of Iyengar Yoga is that when the physical conditions are temporarily unreachable, the asana can be completed with the aid of aids, so today I want to introduce you to the dog pose done with the help of a chair, because the aids are added. , so suitable for all practitioners.
First, let’s know the pose: Upward Dog Pose with the help of a chair, the picture below
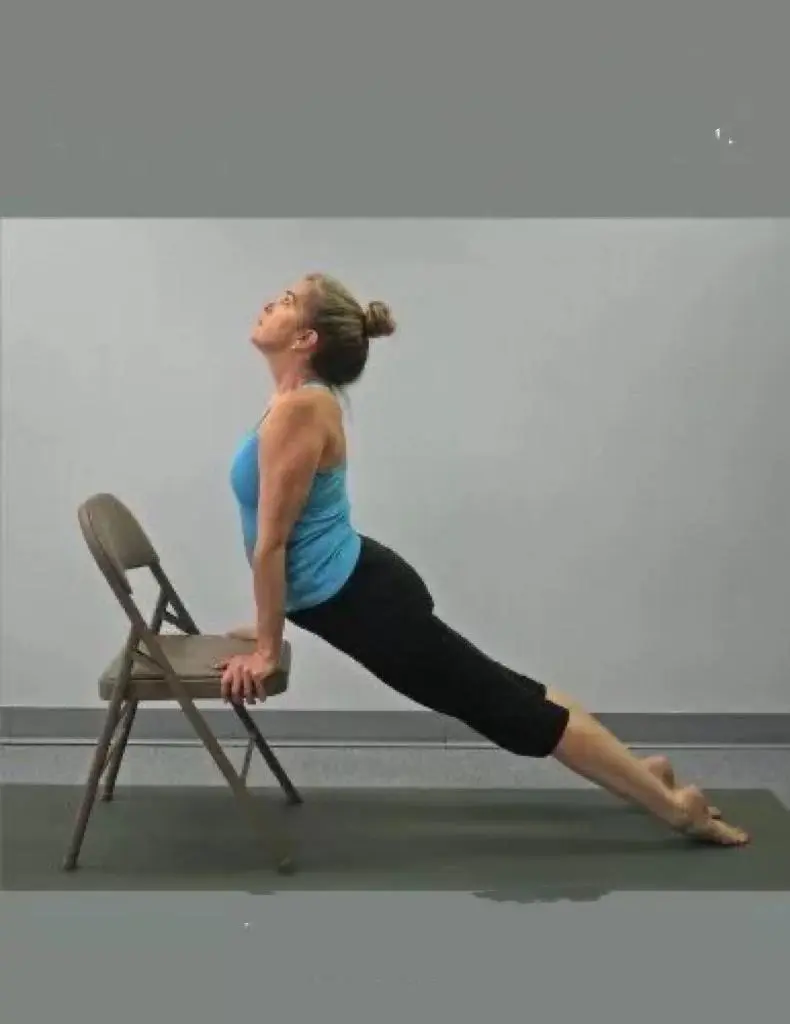
The downward dog pose done with both hands on the chair extends the arms, which is also more conducive to opening the chest and finding the strength of the base of the legs.
Let’s take a look at how to practice:
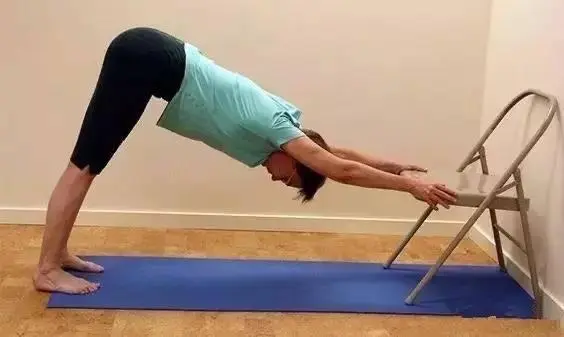
1. Ready to move, down dog on a chair
The chair is fixed, the feet are slightly wider than the pelvis, and the toes are facing forward; the hands are placed on the chair surface, the four fingers are facing out, and the tiger’s mouth is stuck on the chair surface;
Push the back, stretch the side waist and spine; tighten the legs and push up the front side of the legs, so that the legs are as strong as sticks, and the feet are firmly on the ground.
In this downward dog, you want to feel the extension of the side lumbar spine and the tightness of the legs.
2. Preparatory action, dimple in downward dog
On the basis of the previous step, keep 3-5 sets of breaths; lift the heels, step on the ground with the soles of the feet, send the hips higher, and tighten the legs; push the chair with both hands, rotate the big arms externally, and retract the shoulder blades and tighten them. back, head-up concave back;
3. Enter the upper dog
On the basis of the previous concave back, the soles of the feet are on the ground, the ischium finds the heel, the buttocks are interrupted and pushed forward, the groin on both sides is found, the chest is raised, the center of gravity is moved forward, and the upper dog is entered.
Hold 3-5 sets of breaths in the upper dog, continue to tighten the legs, push the feet on the ground, find the back limit of the sit bones, move the middle of the buttocks forward, tighten the back, and lift the ribcage.
4. Exit the dog
Tighten your legs and push the front of your thigh back, shifting your weight back, back to downward dog.
Keep 3 to 5 sets of breathing in the downward dog, and you can repeat the series of downward dog to upper dog exercises.
The above is the complete self-practice steps, let’s take a look at the key points and details.
1. The focus of the downward dog on the chair and the concave back
Although what we want to do is backbend, the downward dog can create a good extension of the spine and side bend. At the same time, the downward dog on the chair elevates the front of the hands, so that the center of gravity moves back to the legs, allowing the The legs are fully activated to prepare the upper dog’s legs and base. So it is recommended to stay here for a while to find the extension of the spine and the strength of the legs.
The concave back has also been introduced more by you. It is not only a preparatory movement for forward bending, but also a starting movement for back bending. The concave back here must keep the legs, pelvis, and abdomen all in the same state, and retain the strength and space created in Downward Dog; open the chest, tighten the back, and transition from forward bending to backward bending.
2. the main points of entry.
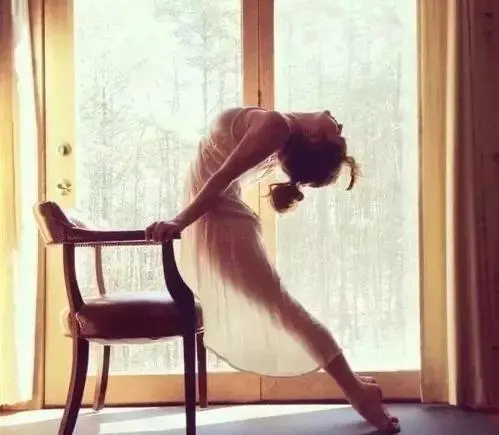
a. Tightening of the legs means that the foundation remains unchanged; b. The upper part of the buttocks is downward, the sitting bones look for the heels, and the rib cage of the concave back is raised to ensure the space of the lumbar spine. As we said before, the upper and lower lumbar spine are far away Extend the lumbar spine in the opposite direction; C. The last hip is interrupted and pushed forward, opening the front groin and completing the backbend.
These points are done at the same time and are the most important points in the basic backbend. As mentioned earlier, the upward dog is the first backbend we encountered, the foundation of the foundation, and it is relatively easier to find these points with the upward dog of the chair. Practice more, for a week, a month or even a few months, you must repeatedly practice to find these points, how to create a foundation, create a space for the lumbar spine, raise the ribcage, open the front side, and tighten the back side. And clearly feel the influence of these points on the backbend, and then slowly bring it into other deep backbends, the following backbend exercises can become smoother and safer.
3. The point of exit.
Exit asana is also an integral part of an asana practice step. Note that the front of the thigh is tightened and pushed back, cutting the groin inward and back, exiting the upper dog and entering the lower dog.
Beginners can practice the tandem on the chair first, then go to the mat to complete the tandem. Throughout the exercise, the waist is completely relaxed, the legs are tired, and the back is thin.
Read more tips about health and fitness http://www.growmorehealth.com
